Thursday, April 23, 2015

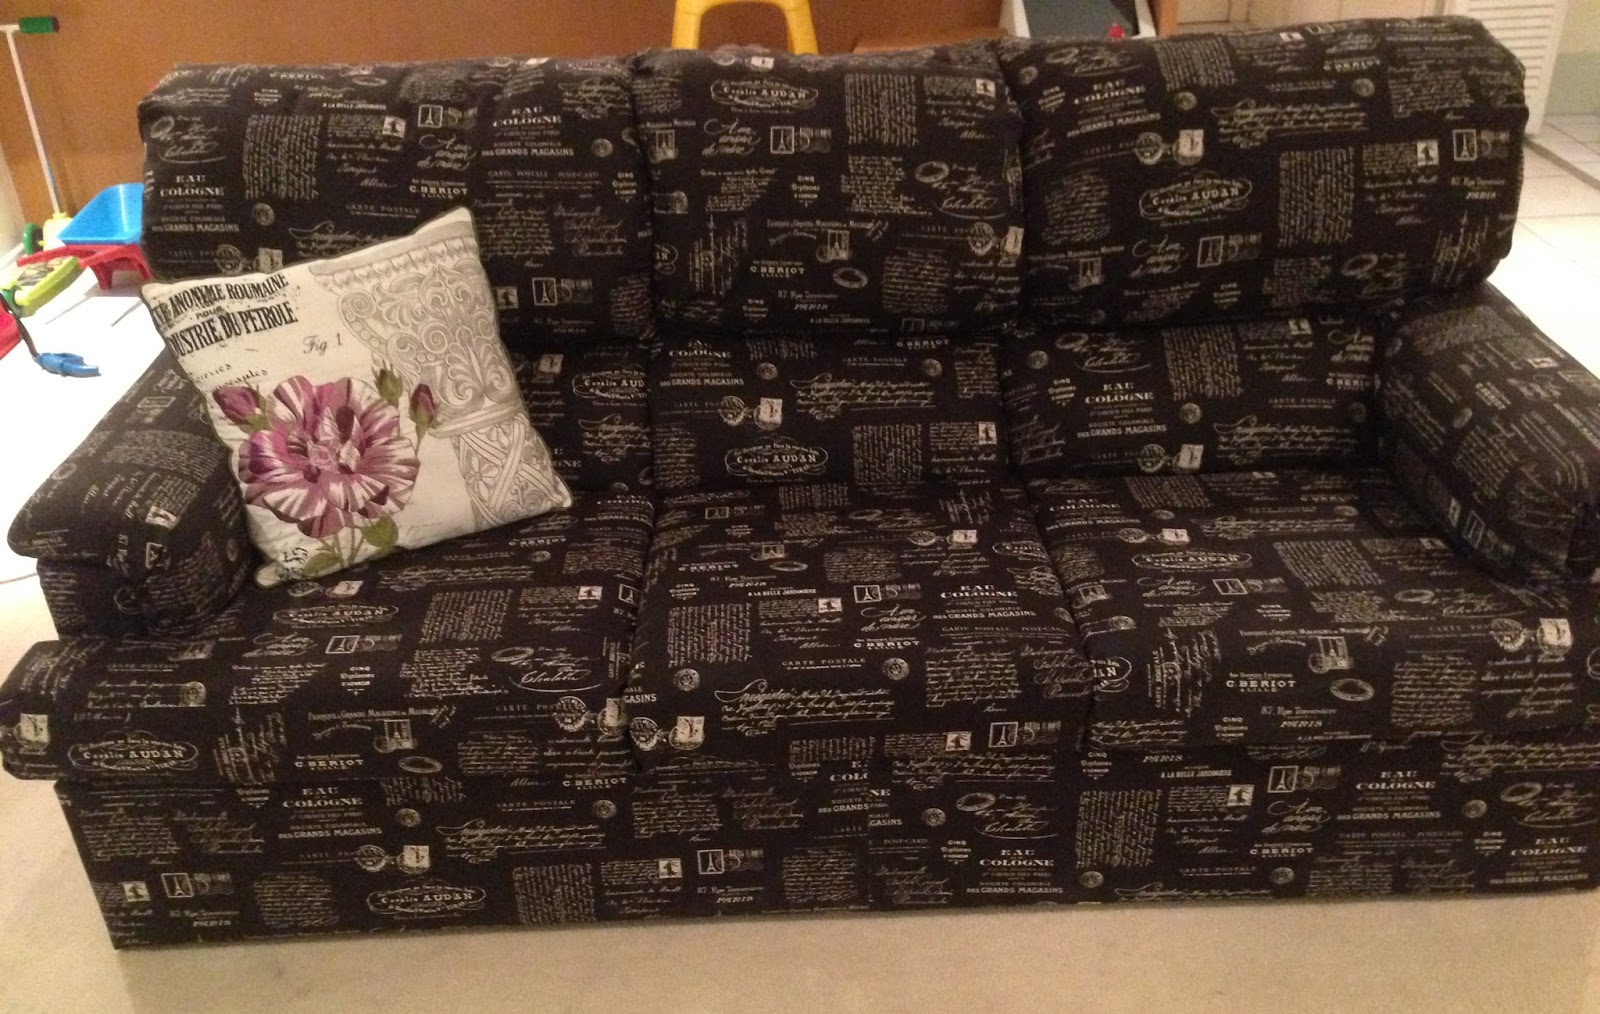
My Re-Covered Lounge - DIY Special for under $200

DIY Lounge Project

A few weeks ago I decided to cover our "Green Crocodile Lounge".  This was a lounge we bought second hand off Gumtree...and it has a bit of a story attached to it.  I won't go into all the details but we bought it urgently as we needed a place for my Mum to sleep when she was coming to visit.  It has a fold-out bed inside so perfect for guests.

DIY Lounge Project

Unfortunately we kind of hated it from the moment we bought it and felt like we got a bit ripped off by the person who sold it to us, so we were tolerating the colour (and had been for nearly 2 years). But on the other hand it was really comfortable to sit on and we found ourselves sitting on "the green lounge" all of the time instead of our leather recliners which we had paid a fortune for previously. 

 I'm not really a green person...well at least I don't really like this shade of green.  We tried to minimise some of the green with the soft grey throw over the back of the lounge.  There was just something about this lounge which felt like it didn't suit us.

I knew in my head that I would like to recover it.  I measured it all up and thought it would take approximately 10 metres of fabric.  Then I priced fabric at Spotlight and realised it would at least cost me $150 to buy the material.  So I shelved the idea for about one year.

Last month I received a Spotlight catalogue in the mail and I had already planned to go to Spotlight the next day.  As I was flipping through the catalogue I saw this fabric at 40% off the marked price and I felt that the colour and style would suit our home.  I wanted a dark fabric that would hide everything because we often sit on this lounge and eat food and watch TV so it does need to handle food and drink spills.  I also felt the colour would go with some woven baskets in our cube bookshelf which is next to the lounge, but not pictured in any of the photos.

So the next day I bought ten metres of this fabric on a whim for $150 and a staple gun from Bunnings for $17 and nervously set to work.  I have never covered any type of furniture before so I was pretty anxious about hopefully doing a good job and not a) wrecking the lounge and b) wasting my money and time.

DIY Lounge Project

To begin with I stapled the material around the wooden base of the lounge.  Which was the easiest bit of all.  Then I worked on the arms of the lounge.  At this point I decided a hot glue gun would be very helpful and fast.  I went and purchased one and some glue sticks to go in the gun for about $15.

Then I completed the back cushions and lastly the front cushions.  I actually thought I had bought way too much fabric at the beginning.  But by the time I got to the end I really only just had enough.  I have a few scraps left over which I plan to make into cushions for the leather recliners to hopefully tie the colour even more into the rest of the room.

DIY Lounge Project

My recovering job is by no means perfect! But you cant really see any of the imperfect bits and it actually came up really well.  I am very happy with the end result.  I am still yet to source some cushions that might compliment the lounge more.  This one pictured below is one we already had at home.  It is doing the job for the time being until I see something nice and affordable.  All of our cushions tend to end up on the floor anyway and I am constantly picking them up.

DIY Lounge Project

Total cost of the project was under $200 and it took me about three weeks to complete it.  I did it mainly when Nicky was asleep or happy playing.  I didn't do it every day.  If you had un-interrupted time I would say 2-3 days should easily have it all finished.

The material I picked is not as good a quality as the original green and has started to get a faded look about it slightly.  But it kind of gives it a chalk-board look which suits me because I like the chalkboard effect.  I can't say how long I think it will look amazing for.  But I think it will be a good kids lounge in a playroom or fold-out bed in a spare room for guests for many years to come.  In the meantime we are using it every day in our main living area until we move into a bigger house or win some money and decide to buy new furniture lol!

Have you ever recovered any furniture?
I would love to hear your story. 

Twitter Facebook Youtube Pinterest Instagram Google+ Bloglovin' Image Map

Sunday, April 19, 2015

Kaisercraft - "All That Glitters" Cards


Birthday card

I really do love this "All That Glitters" Collection by Kaisercraft.
After making a card for the Kaisercraft Design Team Application here I really wanted to keep using these papers and collectables.  So I kept to my original sketch and made a birthday card for my sister (above).

Happy Wedding Day Card

And then two more wedding cards.

I love the Gold Chevron, the Fuchsia pink, the butterflies and the flowers.
This collection really inspired me.


Happy Wedding Day Card


Thanks for stopping by : )

Twitter Facebook Youtube Pinterest Instagram Google+ Bloglovin' Image Map

Sunday, April 12, 2015

My First International Publication in CardMaker Magazine


Tonight I will fall asleep with you in my heart

Hello,

I'm excited to share my first International Publication with you today!

I made this little card awhile back now and it is published in CardMaker Magazine Summer 2015.


Tonight I will fall asleep with you in my heart

Wow! This American magazine is jam-packed with techniques, inspiration and ideas for card making.  It is a wonderful source of ideas.  I am loving sitting down and soaking up all the information and designs on each page!

Tonight I will fall asleep with you in my heart

If you already have this magazine, my card is on the very last page (p 98).
If you don't have the magazine, you can get it here.


Tonight I will fall asleep with you in my heart
Thanks for stopping by my blog.
Have a beautiful day : )

Twitter Facebook Youtube Pinterest Instagram Google+ Bloglovin' Image Map

Friday, April 10, 2015

Crate Paper Notes and Things Publication

Set of Ten Quick Cards

I made this set of 10 Quick Cards using Crate Paper's "Notes and Things" Collection and was super lucky to have it Published in Australian Cardmaking Stamping and Papercraft.

I love this set of embellishments and pastel papers.
I was going for a clustered and layered look on a plain white card base with pops of gold embellies here and there.

This set was published in Volume 21, Number 6 on Page 72.


Twitter Facebook Youtube Pinterest Instagram Google+ Bloglovin' Image Map

Wednesday, April 8, 2015

I met Heidi Swapp!!

Spotlight, Australia

Hello,

A few weeks ago I had the honour of meeting Heidi Swapp at Spotlight.
This was the second time I have met her as I went to see her at Spotlight last year as well. 
(I blogged about it here.)  
Is it just me or is there something terribly unflattering about photos taken in Spotlight?  I get home from these occasions and think OMG what was I thinking?

This year I was so inspired by the honest feelings Heidi shared with us about scrap booking.  I felt so honoured to be there and hear about the reasons behind why she believes scrap booking is important.  How she told us (extremely honestly) about her relationships with her Mum and her eldest son and how she believes Scrapbooking has strengthened these relationships.  I cried through pretty much her whole talk.  The tissues were being passed around.  It was very emotional. I really did feel like I had met an angel on this day.  Her authenticity shone through.

Then Heidi went on to discuss the reasonings behind some of her products.
I found this very interesting, even though I follow her blog, I really love listening to people talk and I loved the insights to the products she gave us.

Spotlight, Australia

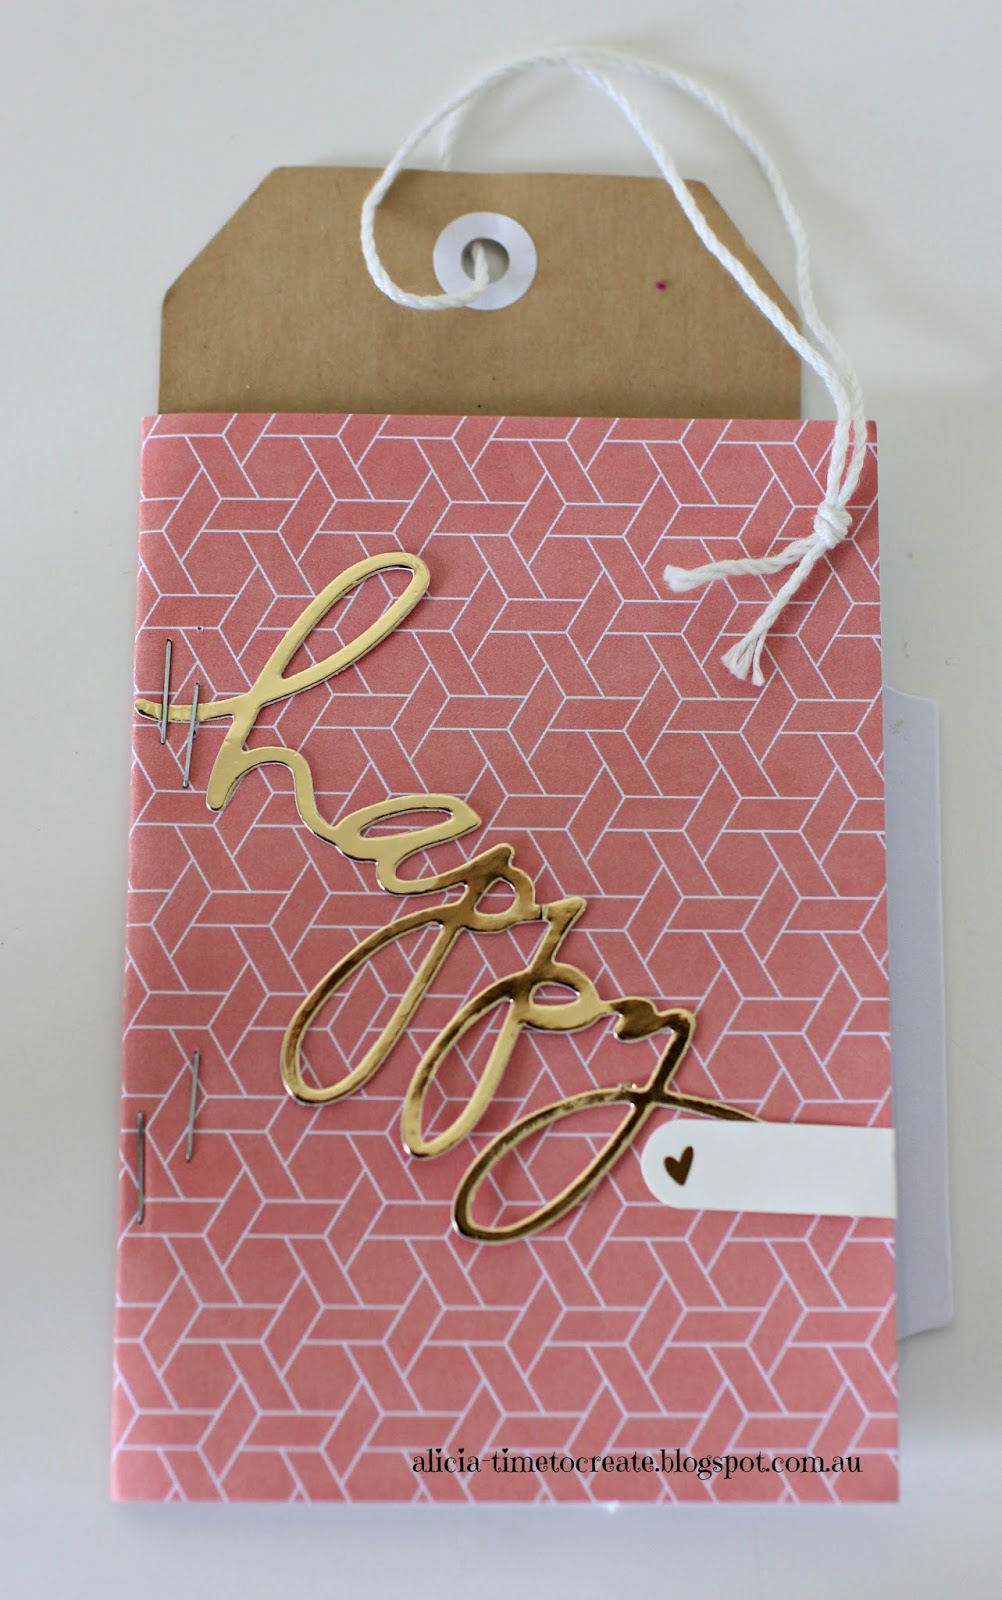
We made a little Make and Take tag card.
I fell in love with the "Happy" Die cut and so I had to bring that home!
I actually used it on the inside of my Easter cards I made last week.
Such a versatile word Happy is.  And it really does bring a smile to my face.  I do really love Heidi's Style.  I love how she just seems to throw everything together so effortlessly and it just looks awesome!
Spotlight, Australia


I also won a prize on the day...but the prize bag somehow went to Perth on the plane.  They said they would send it to me.  Hope they remember to!!

Thanks for stopping by,

Twitter Facebook Youtube Pinterest Instagram Google+ Bloglovin' Image Map

Friday, April 3, 2015

Make last minute Easter Cards fast with this Free Easter Printable!


Quick and Easy Easter Cards

I actually LOVE Easter.  I love all the merchandise that comes out in the shops.  I love bunny rabbits, spring colours, colourful eggs.  I think I love Easter more than Christmas because there is no pressure associated with Easter.  You don't have to spend months trying to get organised for it and there is no financial burden associated with trying to get everyone presents!
We aren't travelling back home (to where our family all lives) so it means we can just stay home and enjoy Ben having some time off work and relax.

A few days ago I thought I might have a little morning tea/craft morning for Nicky and his little friends.  They can paint eggs, make hats and baskets and have an Easter Egg hunt.  I visited Riot and they had so many lovely Easter crafty things and a deal if you spend $20 on Easter things you get $20 free!! That was too tempting for me to pass up so Nicky and I had a lovely time buying all sorts of pastel coloured pom poms, felt, bunny cut-outs etc etc.  While I was there I found some little felt cut-outs of bunny rabbits which I thought would be perfect for some easy last-minute cards.

Quick and Easy Easter Cards

These had to be quick and easy because there wasn't a lot of time to get them made and posted and I wanted to cover everyone in our immediate families including Grandparents so I had to make in bulk.  Plus I had a thousand other things I was trying to get done this week.

I made a little Polaroid Template that I thought you might like to use too.
You can fit lots on one A4 card then just print and cut them out.  It provides a little spot to stick all the felt bunnies.  If you don't have felt bunnies you could use a bunny stamp, or Easter Egg, or a Cross for a more Religious Easter Blessing.

Quick and Easy Easter Cards

I kept my card design very, very simple using left over scraps from paper pads and some pink ribbon.

Quick and Easy Easter Cards

Sometimes simple is all I can manage lol!
These card were very cheap to make.  The felt stickers cost about $4.  Everything else was left overs from my stash.  I saved money by not buying cards from the shop.  And everyone in my family gets a little hand-crafted Easter love!

Quick and Easy Easter Cards

I hope you have a beautiful Easter break with your loved ones xxx
Twitter Facebook Youtube Pinterest Instagram Google+ Bloglovin' Image Map

Thursday, April 2, 2015

Kaisercraft Design Team 2015 Entry


Hello,

Today I am blogging my Kaisercraft Design Team 2015 Entry.

To enter you need to submit three projects; A Layout, an Off-the Page creation and a Card or Mixed Media Project.   The projects must feature current Kaisercraft products.

1. Card - "Love"

Firstly I wanted to share a card I made for a friend to take to the wedding of a mutual friend.  She allowed me the creative freedom to do whatever I wanted so I came up with this card.
Of all creative projects I love to make cards the best.
This card features the "All That Glitters" Collection that has just been released from Kaisercraft.
Oh my, it is so beautiful...full of gold, pink, mint, peonies and butterflies.  I certainly am in "love" with this collection!

How to make this Card:

1. Cut Chevron Glitter paper to 105cm x 85cm and adhere to top of folded card.
2. Cut Golden Flowers paper to 105cm x 70cm and adhere to bottom of folded card.
3. Cover joins of paper with Pink Damask Washi Tape and pink ribbon.  Layer organza ribbon on top of satin ribbon and tie with a bow.
4. Position Collectables in the centre of the card layering a gold circular frame, pink peonies and a pink butterfly cut from "Golden Butterflies" Collection.
5. Add a Hot Pink Paper Bloom to the centre of the cluster.
6. Adhere a "Love" Sentiment collectable to the bottom half of the card.
7. Add some pink gems randomly over the card.

Love Card - Kaisercraft All That Glitters

I have made lots of other cards using previous collections from Kaisercraft that have been published in Australian Cardmaking Stamping and Papercraft Magazine.  
I would love you to visit my Publications Page here.

2. Layout - "Smile"

For my Layout I have used the Kaisercraft Shine Bright Collection.
I had this special photo of Nicky and I that I wanted to scrapbook.  It is hard to get a good photo of both of us these days, so when we spontaneously snapped this selfie I wanted to do something special with it.  I love this sunshiney yellow and back, white and grey collection.  I am in love with black and white stripes so I chose that as the main paper in the Layout.  I also loved the yellow chevron...when you start going through the papers and the collectables from this collection you will find there isn't much you don't love!  I pulled out so many bits and pieces for this layout and only used a few of them.  This would be a great collection for a mini album.

Smile Layout - Kaisercraft Shine Bright


How to Make this Layout

1. Start with a 12x12 black card.
2. Trim the Black and White "Golden" striped paper a little and layer it onto the black card leaving a black border edge all the way around.
3. Cut another black square and a yellow square slightly larger.  Layer the black square onto the yellow with another border all the way around.
4. Layer your photo with black card.
5. Cut a strip of the yellow chevron "Sunflower" paper and layer it onto a strip of black card on the right-hand side.  Then add a white border sticker to the black strip.  Add the grey sticker with the quote "There are so many reasons to be happy" on the left side of the chevron strip.
6.  Layer the black and yellow square into the middle of the page.  Adhere the Chevron Strip over the top of the black and yellow square. 
7. Make a little tag for some hidden journalling that slips in behind the photo.  Cut a box of lined paper from "Mango" with the heading "Shine on" at the top.  Staple on a "memory" Collectable and a Grey banner collectable to the back of the card.  Embellish with a black star.  Then add your journalling.

Smile Layout - Kaisercraft Shine Bright

8. In the corner where your photo will go stamp some "Shine Bright" circle stamps and layer some grey banner stickers over the top.  Glue on a black heart collectable and add another black star.

Smile Layout - Kaisercraft Shine Bright


9. Then add your matted photo over the top of both.  Leave a gap at the top of the photo to allow for a tag with hidden journalling.
10.  Finally glue two tags together (one that says "Embrace the Journey") from the Collectables with white and gold twine and paste at the left-hand bottom corner of the photo.  Then add the word "smile" at the bottom of your photo onto black card.


Off The Page - "Dream Big" Wall Art

For my Off The Page Project I used papers and Collectables from the Kaisercraft Blue Bay Collection.  This is a beautiful collection. When I was making this 3D Wall Art I was picturing this as a mini Vision board for myself with colours I would love to furnish our Dream home in.

Dream Big - Kaisercraft Blue BayHow to make this Off the Page Project:

1. Paint the edges of the four wood panels with an off-white paint
2. Adhere paper from the Kaisercraft Blue Bay Collection (that is cut to fit with corners rounded) using Mod Podge.
3. Ink the edges with White ink.  Paint Mod Podge over each panel.
4.Then glue the two horizontal wooden bars to the back of the four panels with Mod Podge.
5. Glue the "Dream Big" sentiment to paper and cut around the word with a blade.  Ink the edges with white ink to soften it.  Paint over with Mod Podge.
6. Position some collectables around the word.  I chose an aqua frame, white shutters, a large white clock, a circle of love and a key hole...all of these things are symbolic of my Dream home furnishings.
7.  When you are happy with the positioning, glue these collectables down and paint Mod Podge over the top of them,
8. Then glue the Dream Big word down.
9. Finally embellish with three Kaisercraft Chipboard love hearts that have been inked with white ink.

So thats my entry!
Thank you for taking the time to look at this showcase of creative projects.
Fingers crossed something wonderful happens!!

Have a beautiful day,
Twitter Facebook Youtube Pinterest Instagram Google+ Bloglovin' Image Map