Monday, January 30, 2012

Growl...look out, there is a lion about!


Hi Blogging Beauties,

Growl! I have a lion card to share today!
I made this for my cousin who turned three.  He loves jungle animals.
I thought I would enter it tin the Pixie Dust Studio Challenge - Animals at the Zoo.

I coloured him with the following Copic Colours:
Oranges: YR68, YR04, YR23
Reds: R46, R35, R20
Greens: G17, G05, G02
Browns: E15, E31, Ell
Outline: W-1


Grocery shopping for me today...a Monday job when I am not at work.
Then my beautician treated me to an extra long facial...not sure what I did to deserve that, but it was delicious.  I havent had one in nearly a year and I had forgotten how good they are.  It was lovely.  I drove home in a relaxed daze thinking I dont know if I should be driving...like after a massage and you just dont have your wits about you!  But made it home safely, thank God.

Ben's new camera arrived today.  He has been so looking forward to it.  He has lots of ideas for photography...maybe I might share some interesting photos he takes!

Well, I hope wherever you are your day or night is going well.
Thanks for stopping over at my blog : )

Alicia xx

Saturday, January 28, 2012

Smash Book Recipe - Slice


Hello! Today I would like to share another recipe for my Smash Book.

Elizabeth told me about this Recipe challenge over at Lasting Memories where you follow the following sketch and I really wanted to try it out.

I tried my best, but had difficulty following the sketch exactly.  This is what I came up with:


You are probably thinking this looks nothing like the sketch!  I think that too...but maybe it is more "inspired" by the sketch!!  Anyway the recipe is a really good one.  I make it all the time and everyone loves it.  So if you want a quick, easy, pretty healthy chocolate slice give it a go!


I also have a "pretty in pink" Anya Princess card to share today for our 

Carol, a good blogging friend of mine has a limited amount of Copics.  She sent me a list of what she has got in her collection and I coloured my Princess Anya stamp only using the Copic colours she owns.


The colours are: 

Hair: E37, E33, Y17, Y11 and Y02
Skin: E11, E21
Pinks: R46, RV34, RV23

Do you have a smallish Copic collection and want some help putting them together on an image?  Why not email or leave a comment and I will see if I can colour something for you.

For this card I used papers from the Be Mine paper pad that is in my Valentine's candy.  I bought two pads at the time, one for me and one for the lucky winner! The papers are delicious!  I have my sewing machine out again now and I am a bit fed up with the white stitching not really showing up on the cards so I have gone for dramatic black!

I would like to enter this card in two challenges:

I have used a sparkly ribbon buckle, some large rhinestones and glitter on the image
and
I have used a heart-shaped doily.


Sammi has an awesome collection of the Anya stamps in her store here.
They start at $8 each, which is so affordable.  If you are after some new stamps to motivate your colouring head on over to Sammi and she can definitely help you out.

Mad For Markers [home link]
I hope you have a lovely weekend.
Thanks for stopping by!

Alicia xx

Thursday, January 26, 2012

Farm Photo Cards


Hi Blogging Beauties,

I have something a bit different for you today...some photo cards.  

I made these top two for my Dad's birthday and the bottom one for my Grandad's birthday.
Sometimes I just have no idea what to make them for cards...you know...when you are totally lacking inspiration and you need a card in a hurry!!  These photo cards are very quick and easy.  Just print a photo off and paste it on and add a sentiment and you are done!

Apologies for the glare in the second card...I couldnt seem to avoid it.

These photos I took of my Mum and Dad's farm.  The first one is the sheep passing the dam.  The second one is two paddocks.  The nearest paddock has sheep and the greener paddock in the distance has round bales of oats in it.  The photo below is of a dead tree (maybe a bit depressing, but the colours in the sky are quite pretty...it does look a bit better in real life...the truth is it was a left over photo that didnt fit in my project life album and was hanging around on my desk so it quickly got put onto a card.)  Maybe I should have a warning sign on my craft desk...dont hang around here too long or you might find yourself on a card!


The recipients actually really loved them, and everyone enjoyed passing the card around for a look.

Well, it is Australia Day here today.  So a Public Holiday.  And Country Music in Tamworth.  We went in to watch my brother perform his poetry this morning.  Then later tonight we are going to a Maton Guitar concert.  Ben gets the day off work!

Hope you have a happy day, wherever in the world you may live.

Alicia xx

Tuesday, January 24, 2012

Tutorial for Colouring Blush Babette with Copics


Hi Blogging Beauties,


Here is my first photo tutorial.  There are 22 steps altogether.  
I have written it in a step-by-step fashion to try and explain how I coloured her.  
I apologise for the shadows in some of the photos.  I will try to correct that next time.
You can purchase this stamp here.
You can also see this tutorial on the Mad for Markers blog here.
Let's get into it shall we!


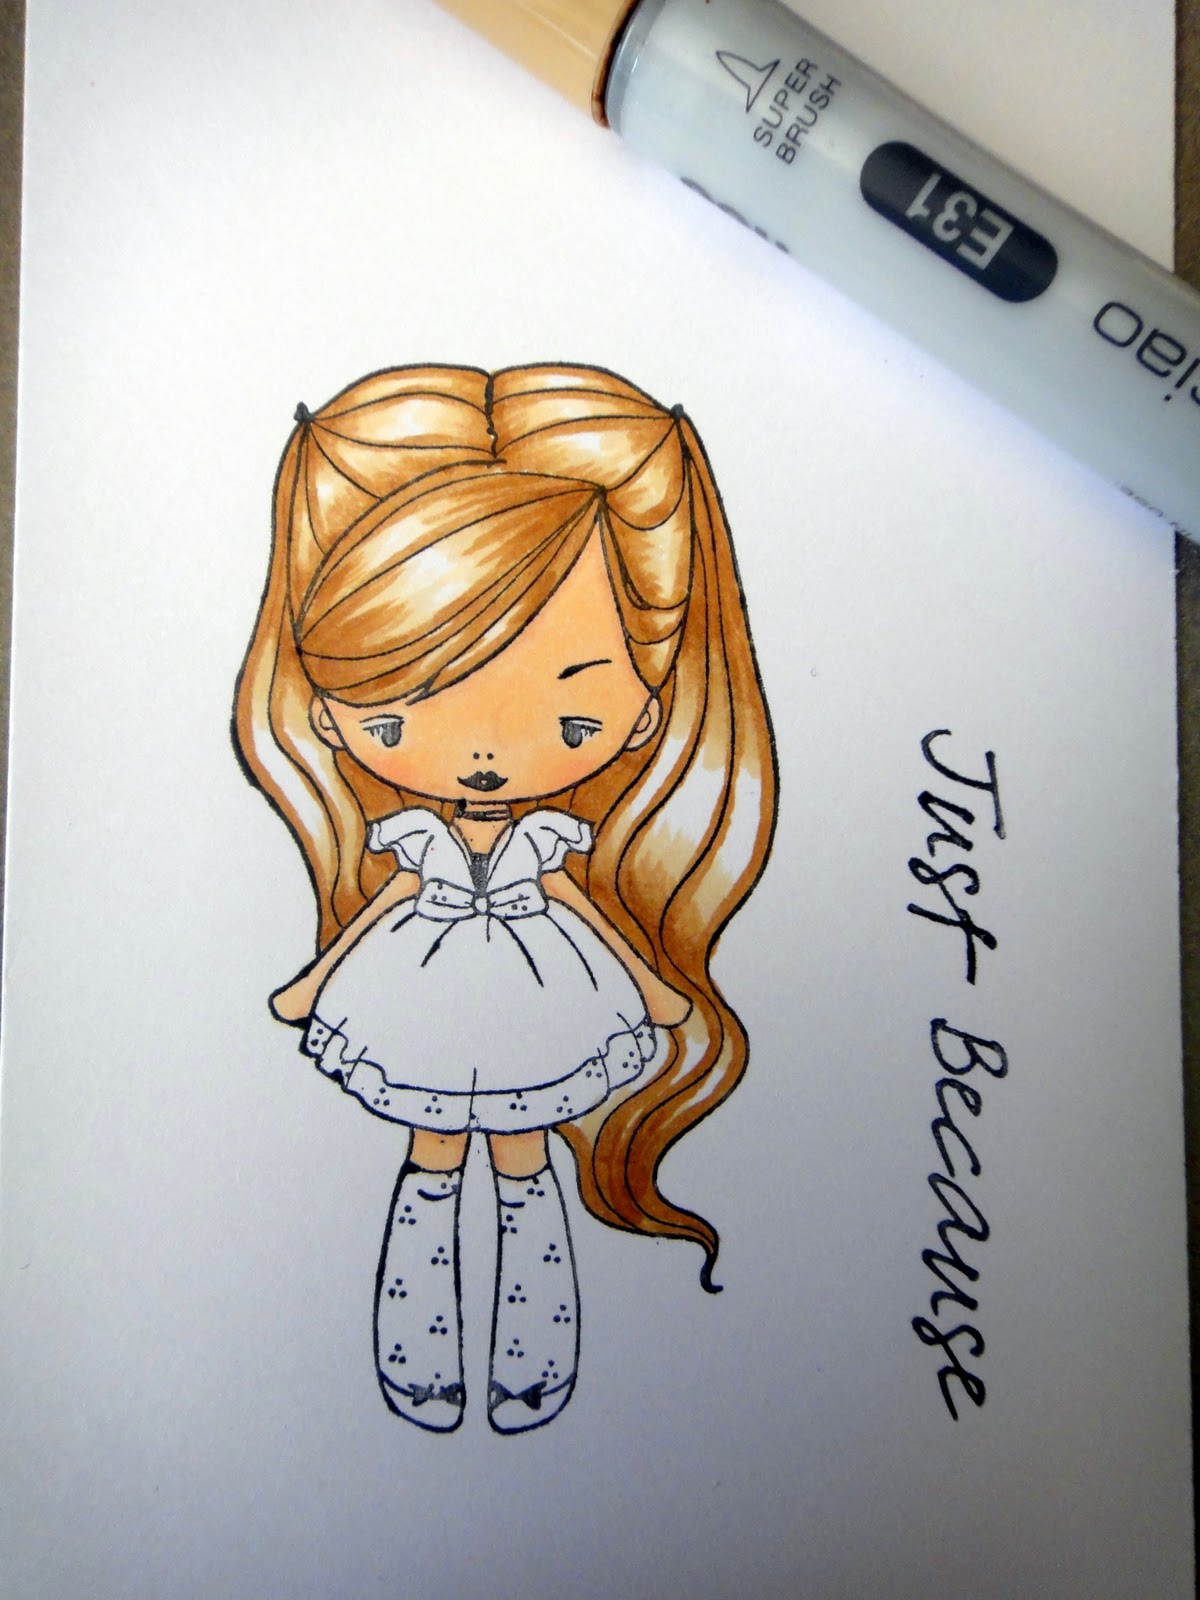
 I coloured Blush Babette using these colours:

Skin: E00, E11, R20
Hair: YR20, E31, E35
Greens: YG03, YG23, YG00


Skin
1. Colour the whole face, arms and legs with E00.


2. Trace the shadows with E11.


3. Colour the whole face, legs and arms again with E00.
4. Add some R20 to her cheeks and then blend with E00.


Hair
5. Trace the outlines on the front section of her hair with E35.
6. Use a flicking motion to flick into the centre of the fringe leaving white spaces.


7. Continue the flicking motion with E31, going over the E35 and further in onto the white.


8. Continue the flicking motion with YR20, going over the E31 and further in onto the white.
Still leave a bit of white space not coloured.


9. Enhance the fringe by going back over the lines and dark flicks with the E35.
10.  Follow exactly the same process with the two top sections of the hair with the E35, then the E31 and then the YR20.


11.  Follow the same procedure for the long parts of her hair.  
Leave white spaces where the light would be.


12. Add in some E31.


13. Add in some YR20.


14. Go back over the darker bits with E35.


Dress
15. Trace the pleat lines with YG23.


16. Go over the YG23 and further onto the white with YG03.


17. Go over the YG03 and further onto the white with YG00.  Leave some white spaces.


18.  Trace the dots in the bow and the hemline with YG23.


 19. Colour the bow and hemline with YG00.


Socks and Shoes
20. Use tiny flicking motions with the YG23 on the outsides of the socks and shoes.


21. Use tiny flicking motions with the YG03 covering the YG23 and going further into the white.


22.  Use tiny flicking motions with the YG00 going over both green colours, but still leaving a tiny bit of white.

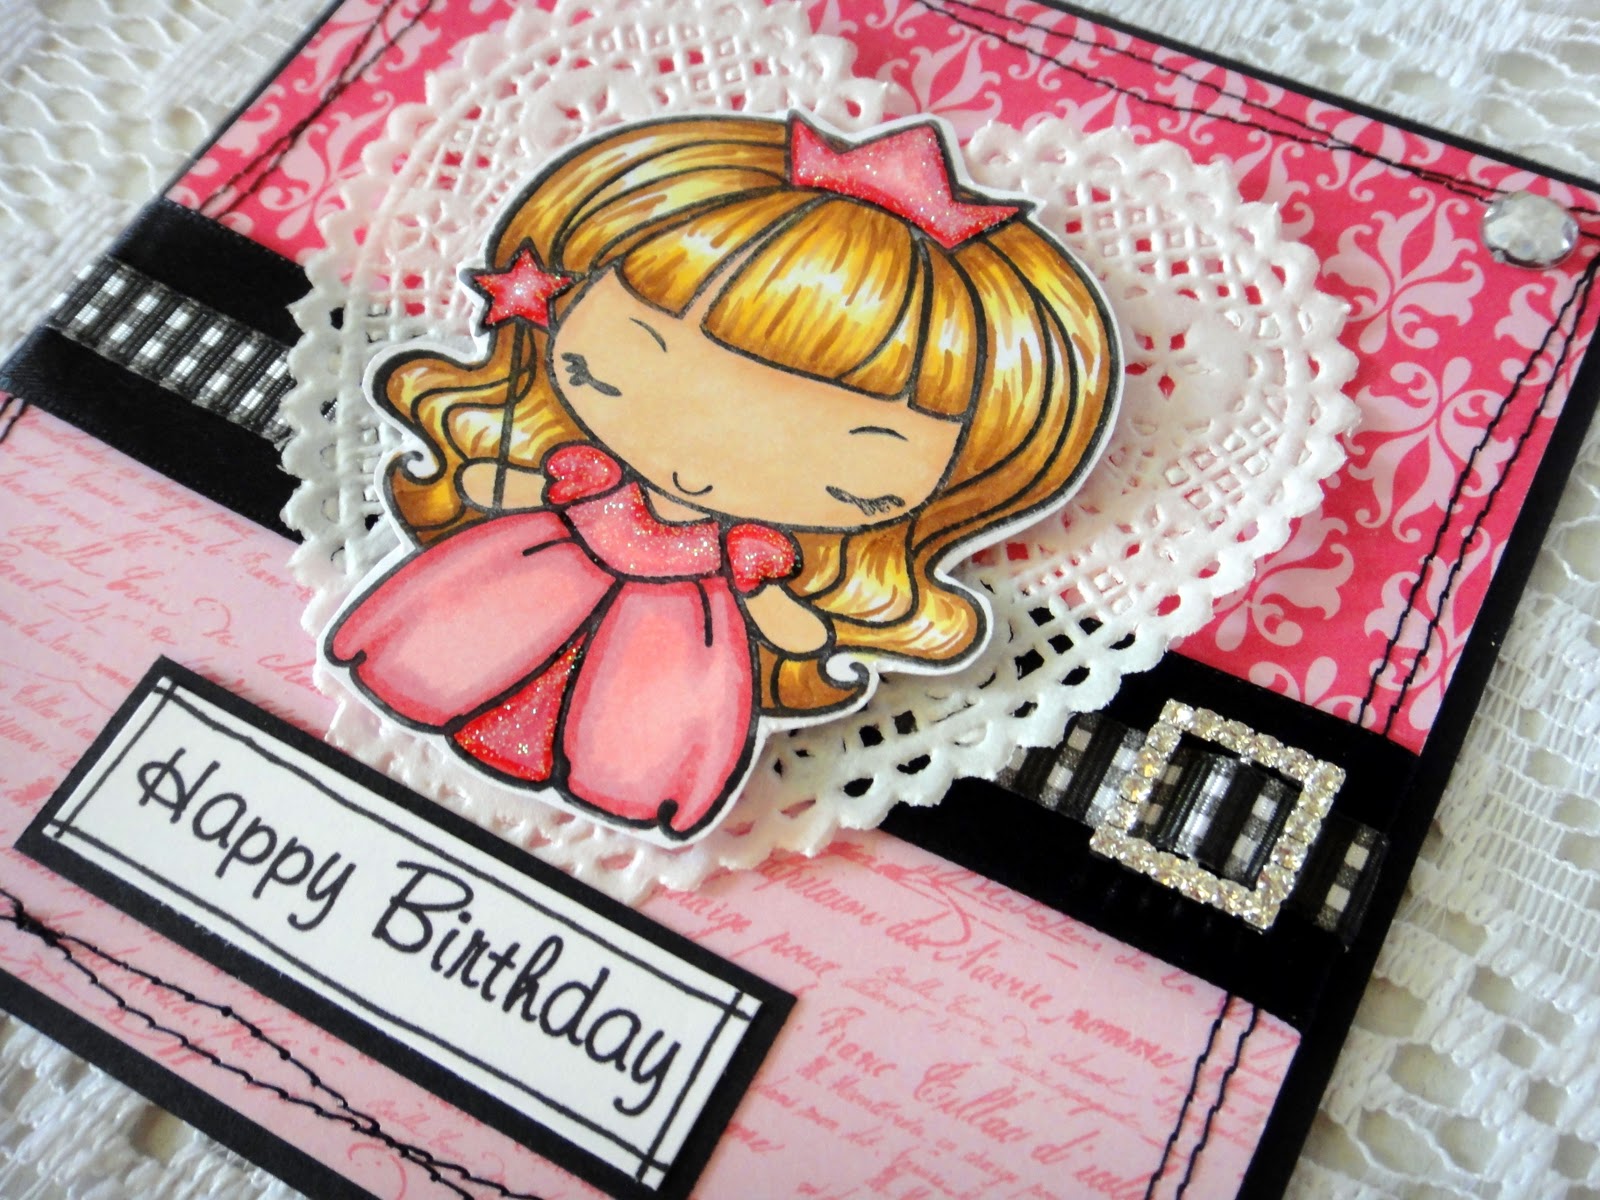
Here she is finished and on a card!


I hope you might find this a little helpful.
If you have any questions please feel free to leave a comment or send me an email.
I might try to do another tutorial soon.  If you have any requests on colours or stamps let me know.  Have a great day : )

Alicia xx

Monday, January 23, 2012

LOTV Lavender and Lace


Hi Blogging Beauties,


I made this card for the 3rd Challenge at Lili's Little Fairies - Lavender and Lace.  The inspiration form the DT is just amazing - I mean it will knock your socks off! Those ladies sure know how to make a card!  Pop on over if you get time and enjoy!!

I started my card with a LOTV die cut and kept the LO pretty simple.  I have no purple DP left in my stash except for some very small scraps so I had to just use purple card layered onto a paper lace doily.  For someone with no purple DP I have quite a good collection of purple flowers.  So I layered these onto some white leaves.


I found a little chip board heart and thought I could make this into my first Valentine card for the year.  I coloured the heart with Copics and used some rub-on letters for the sentiment and drew on the heart with my black copic multi-liner.  Then I layered the heart onto a bow and then onto a flower.


 For those of you interested in my photo tutorial for colouring Blush Babette I have been talking about.  That will be blogged tomorrow at 9am on my blog and the Mad for Markers blog.  So stay tuned!! It has about 20 odd photos in it...it is very step-by-step so I hope you find it helpful.

Today I spent most of the day in town getting groceries and visiting my Grandad.
I got a lovely dress on sale for $22! What a bargain.  Clothes are becoming quite difficult for me now.  I am 29 weeks and getting heavier and bigger.  I will have to post a photo of the growing baby bump soon!

Have a lovely day, wherever you might be.
Thanks for popping on over and visiting me.

Alicia xx

Sunday, January 22, 2012

Two "Sweet Nothing" cards...


Hi Blogging Beauties,

I hope you are having a lovely day.  It is Sunday morning here...I am lucky to have the day at home, and I am still deciding what to do.  I have a bit of mulching that needs doing in the garden so if I am feeling energetic I might get to that later on.  I thought I might pop on and do a blog post.  This card I made for Ben's Nan to give to a family member - Madeleine who turned 90 recently.  I used Kaisercraft Sweet Nothing papers, some gem swirls, blossoms and a Prima butterfly.  It turned out very fancy.  I hope suitable for a 90 year old lady.


This second card is using the same papers and the dove is a collectable from the Sweet Nothings collection. I made this for my cousin Monica to give a lady at her work.  The story is very sad.  The lady's daughter, Bronte (19 I think) was killed a week or so ago in a car accident.  I dont know all the details, but her boyfriend found her and then died by getting electrocuted from a power line right near the car accident.  A very tragic event for this area.  Monica asked for a card with angels and her name written softly on a love heart.  This was my interpretation.


 I hope it brings the lady some comfort, if that is possible.


My project life is going along well.  I am up to November 2011 now, still have December to go...so nearly finished 2011.  I am really happy with how it turned out.  I might do a video of it at the end to show you.

Well, I hope you have a lovely day, whatever you might be up to.

Thanks for stopping by,

Alicia xx

Saturday, January 21, 2012

Mad for Markers Green Colour Combo


Hi Blogging Beauties,

Happy Saturday to you all!!
To celebrate the weekend I am sharing another Blush Babette card.  This time I have used some green Copics.  I dont often colour with green.  But I do really like the colour.

The Green Copics I used are:
YG03, YG23, YG00
For her hair I used:
E35, E31, YR20
For her skin I used:
E11, E00, R20

You can purchase this stamp at the M4M store here.

Mad For Markers [home link]

I have photographed a tutorial for how I coloured her so stay tuned for the tutorial to be blogged soon!


I followed a sketch over at the Farm Fresh Challenge blog. It is for their Friday Spyday challenge again.  This was the card to case (designed by Sheena):


Have you seen my new Valentines candy!  Lots of yumminess to be won!
Don't forget to enter!!!

Have a lovely weekend and happy colouring!

Alicia xx

Thursday, January 19, 2012

More LOTV Die Cut Cards


Hi Blogging Beauties,

How are you all today? It is hot here and I am feeling it! I have been into town for a few jobs and am back home again.  Turned the air con on...pleased to be in the cool.  I have some more cards to share today that I have made with the Lili of the Valley Die Cuts.  They sure make cards quick and easy.  


The first card I made for my Mum to give a friend who retired.
The second one was a quick little one I made for my brother to give to my Mum for her birthday.


This next one I made for a new baby in our family that was born in Japan.


 These next three are all Sympathy cards.  One I sent to a friend, the rest I put in my stash.


 This last card I made as a Special Order card for a Baptism...requesting a very girly and pink card.  I actually coloured over the die cut with my Copics so the picture would match the pink of the card.


Thats it! You did well to make it to the end.
I have almost finished my Project Life for 2011.  Should have that done by tomorrow.
Then I need to decide what photos to do next...am considering going back and doing 2010 to fit at the beginning of that album as I still have heaps of room in it.  Then starting a fresh album for 2012.  Also I am considering having another go at my baby photos...but it is the scanning of them all that makes me reluctant.  Lots more work involved...will keep you posted on my efforts.

I hope you are having a lovely day.
Thanks for stopping by.

Alicia xx